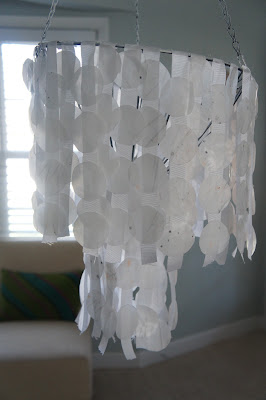
So, instead I have begun searching for other places where capiz can maybe make an appearance in our abode. And it hit me: our beachy patio makeover seemed like the perfect spot, especially when I stumbled across some tutorials for DIY capiz chandeliers. I figured I could take the light part out of the chandelier and follow the same basic plan to make my own fun capiz mobile. Overall, I would say it was a good plan. Here's how it turned out (currently hanging out in our living room awaiting its more permanent home on the patio):
And like any good project, this was amazingly easy (and affordable!) to accomplish. Want to make your own? Here's what you'll need:
- 2 sheets parchment paper
- roll of wax paper
- crayons (optional)
- circle to trace (or fancy circle cutter if you're cool like that)
- iron
- hanging planter basket
- white spray paint
- 2 spools white ribbon
- glue gun
To begin, you will need to make your capiz shells. I suggest giving yourself a few days to do this because while the process is not difficult, it is rather monotonous. Place three sheets of wax paper in between two sheets of parchment paper (all of mine measured about 18 inches long, but I just eyeballed it). If you want to add a little bit of interest to your shells, you can put some crayon pieces on the different layers of wax paper (I used gray and peach). Iron over the parchment paper to fuse the three sheets of wax paper together. Repeat on both sides. Remove the parchment paper and save them for making the rest of your shells.
Trace 1 1/2 inch circles onto the wax paper (I used a spice jar top as my guide), and then cut out each circle. Repeat this process about a bajillion times. It seems really intimidating, but put on some Bethenny Ever After and really it's not that bad...I promise. I I'm not sure exactly how many shells I ended up using, but I'm estimating it at about 200. As for time, it took me about 30 minutes per cycle: to cut the wax paper, iron it, trace, and cut about 60. Here's what they look like all ready to go:
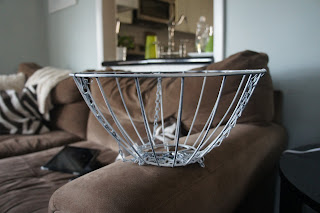
When you're ready to start making your mobile, spray paint the basket white. Here's what mine looked like after it was painted (it started out black):
Next, cut your ribbon. Mine were approximately 10 inches each. Use a glue gun to hot glue each piece of ribbon to the top of your basket hanging down. Glue the ribbon strands so that the top of the basket is completely covered. Next, use a tiny dot of glue to attach each shell to a ribbon. I put 4 shells on each ribbon and staggered them. Once you finish the top, repeat the same process for the bottom part of the basket. And voila you'll have a a lovely capiz hanging!
Pretty easy, huh? Now I just need to finish the rest of the patio projects, so that I can place this beauty in its rightful place.
Pretty easy, huh? Now I just need to finish the rest of the patio projects, so that I can place this beauty in its rightful place.


No comments:
Post a Comment
Make my day...leave a comment