Showing posts with label playroom. Show all posts

September 23, 2013

Desk Nook Phase 1

***So it turns out I accidentally shared phase 2 of our desk nook before I shared Phase 1.  Well, here's the first part...of which you probably already caught glimpses if you read last week's phase 2 post.  Oh well!***

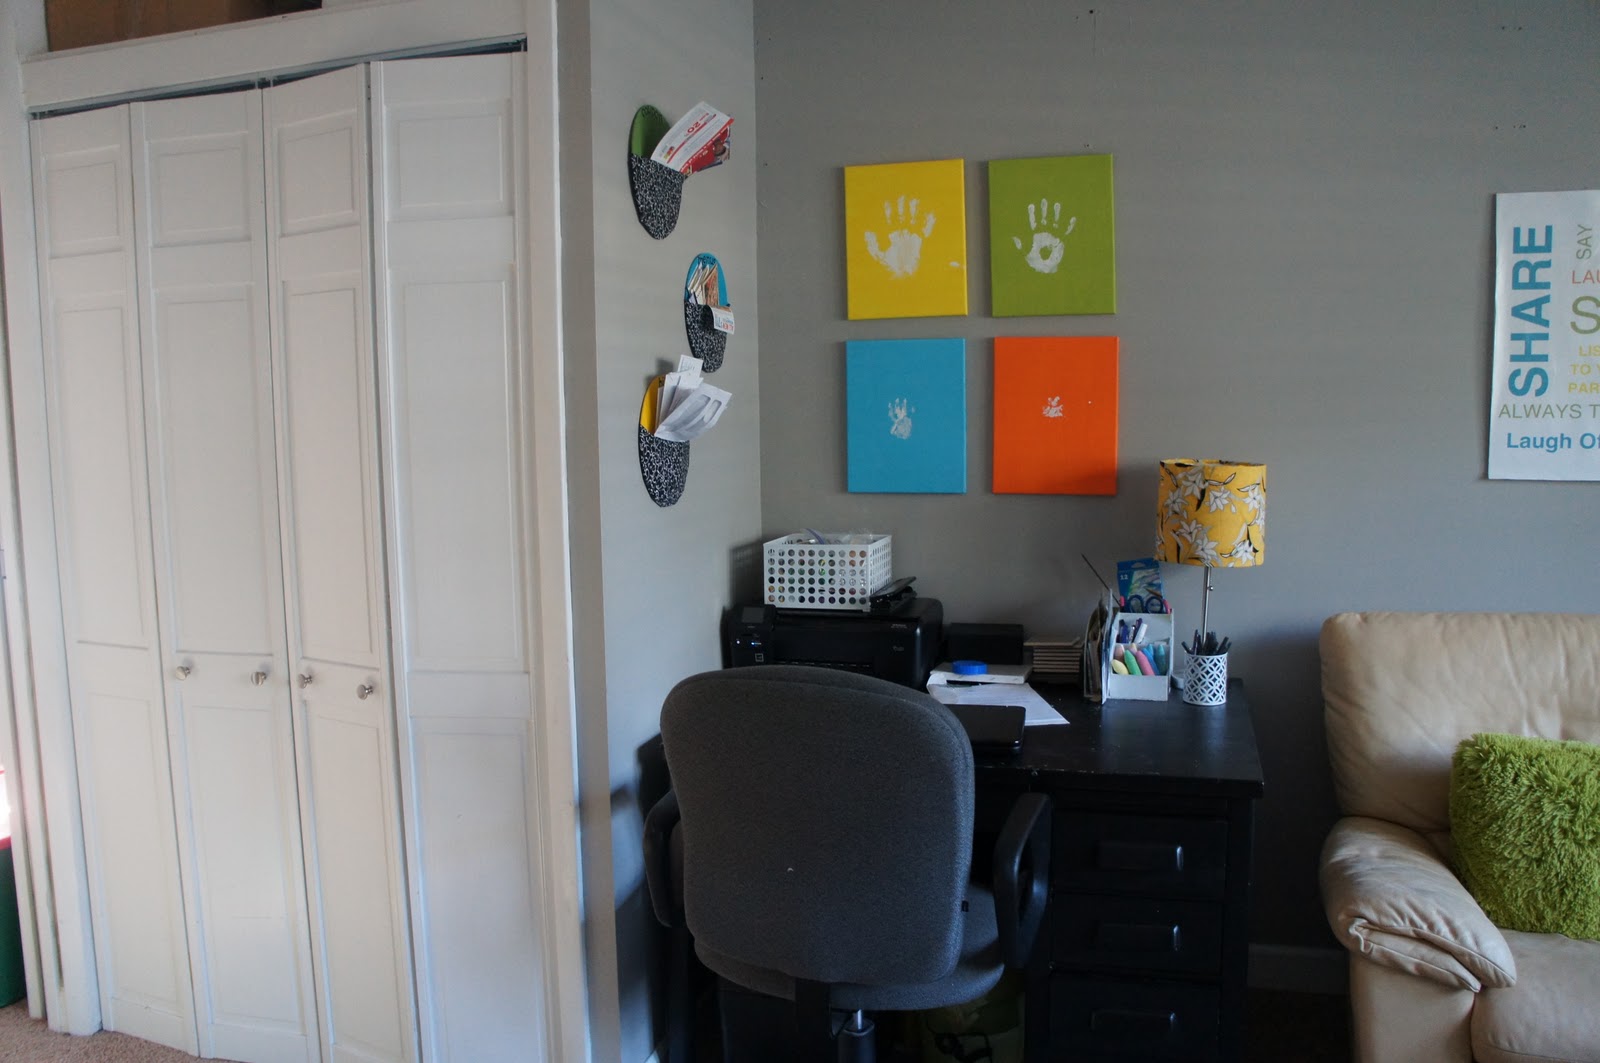
A few weeks back while attempting to tame the chaos that had become our playroom, we decided to move our desk into the closet, thus freeing up precious real estate in the actual room.  Although it was kind of a last-minute decision, it's actually really working for us. So now that we know the desk is there to stay, we have some major work to do to make our nook look a little less blah and chaotic:
The first step I took was to go ahead and paint the inside of the closet the same gray as the rest of the room.  Luckily, I had some leftover from when I had painted a few years back, so it was pretty straightforward.
Once that was done, I got to work dealing with the space above the shelf.  In looking at images of desk closets (there's tons on Pinterest if you're interested), I found that I was drawn to those that had a fun pattern on the back wall.  I considered painting stripes...or chevron...or some other pattern, but honestly, I've been there, done that and wanted something different here.  My next thought was to maybe do some wallpaper or something back there, but from what I could tell, cool wallpaper is pretty darn expensive.  And so I started looking at the potential of using fabric...and that's when it dawned on me!  
Instead of just hanging up a big ole piece of fabric, I should cover some cork with the fabric and achieve two goals: fun pattern on back wall AND a place to tack up inspiration, announcements, reminders, etc.
So that's exactly what I did.  I picked up a roll of cork at AC Moore which happened to be just about the exact measurements I needed for our wall (minus a couple inches on the side, but oh well) and a yard of fabric.  I hot glued the fabric to the back of the cork, folding the corners like a present and when I was done I had a fabric-wrapped piece of cork...that I promptly nailed to the wall.
You may have noticed that with the fabric in place, the shelf and other clutter were too much, so I also did some paring down in there.  But looking at that mess, I obviously had some more work to do.  Have no fear, I quickly took action to tackle Phase 2.  I'll be back soon with those details...


September 18, 2013

Desk Nook Phase 2

I'm in the process of attempting to convert a very cluttered closet into a comfortable, functional, stylish desk nook.  And when we last left it, I had made a bit of progress in that I had decluttered slightly, painting the inside of the closet to match the rest of the room, and installing a quick and easy fabric cork board to have a pretty place to store all kinds of notes, reminders, etc.
So the next step was coming up with something for below the shelf that would both look pretty and clear up some space from the desk and shelf.  The winner?  Pegboard!  At just about $7 for a 24x48 piece (which covered my space perfectly), it was a totally affordable and easy solution.  I did pick up a couple pieces of 1x2x8 (cut to size...two pieces at 24 inches and 2 at 48) because one of the workers at Home Depot told me that the pegboard couldn't lie flat against the wall or no baskets would be able to hang.  Makes sense, right, but honestly, I hadn't thought of it!  He also told me I should drill everything in...the 1x2 pieces and then the pegboard into the 1x2's.  So I did....or more accurately, I drilled the 1x2's in, and Josh drilled the pegboard in (I tried but couldn't quite hold it and drill and all).  Oh, and before I put the pegboard in, I painted it (of course!) with some blue I had leftover from our front door makeover.

As you may be able to tell, I headed back to Home Depot to pick up some hooks and baskets (by the way, I think you can probably get prettier options at fun places like Ikea and Container Store...neither of which we have here in VB), and I immediately had so much storage...like enough to get rid of all my clutter.
I did use one of the hooks to hold up a pen holder I already had on hand and another to hold up a basket that I already had (which is now storing bills that need to be paid).
And with that pretty simple project, I can confidently say that our desk nook is well on its way to being legit!

  I'm not quite done yet, though.  We most definitely need a new desk chair there...something smaller, less chunky, and prettier.  And I would love to swap out the old desk for a simple filing cabinet/slab of wood (painted of course) piece, but that may be harder to sell Josh on. 
So, Phase 2 may be complete, but we are not quite done yet.  Now off to the thrift stores to try to track down a chair worthy of a makeover...


July 11, 2013

Proceed with Caution

When we bought this house, we nearly doubled our square footage from our previous home.  We moved in kid-less and set up shop, marveling at how much space we had!  Fast forward to the present day.  Two kids and all their junk later, we are already busting at the seams in this place. Fortunately (or not...you be the judge), we tend to keep the chaos pretty well contained in our main living areas.  But when you step foot in the playroom and/or laundry/storage closet, disaster is pretty much the only word that comes to mind.  Take a look:


Starting next week, the boys will both be in camp for 12 glorious hours a week for the next four weeks (!).  I should have pedicures, massages, and pool time on my agenda, but instead I plan to conquer this beast...pathetic, huh?!?  Here's the basic plan:
  • relocate craft/party supplies to laundry closet
  • get shelving of some sort to store craft supplies
  • convert closet to desk
  • move books elsewhere
  • come up with toy rotation system
  • store rest of toys in more organized way
 Fingers crossed that by August this space is functional again...or at least more functional than it currently is!  Or fingers crossed I don't get buried in all the junk that is currently in there.  Whichever seems more appropriate!


April 23, 2012

Choo Choo

We hear that word a whole lot in our house these days.  Ever since receiving a simple train set for Christmas, Colton has become obsessed them!  But we had a small problem because although he had a set (actually 2 of them), we didn't have a spare table large enough to host his new-found passion.
Well, last week when I was hitting up Goodwill looking for a frame, this guy was sitting outside just waiting for us:

Except it was still in one piece.  If you can't gather it from the above pictures, it's a train table and for only $18, it became ours!  The train table was in pretty good shape, but I, of course, had to make it ours ya know.  
The first thing I did was take the stickers off (they're already off in the above pictures).  Some of the stickers were pretty easy to get off with Goo Gone, but there were some that just weren't budging.  Well, I read online that by aiming a hair dryer on them for a few seconds it would loosen...and it totally worked!!!  Yay!
Next, I made sure to give the table a good cleaning just using a simple water/vinegar mix and a sponge.    And finally I was ready for some painting.  I had decided just to use the water/grass design that was originally on the table top (I mean why mess with a good thing, right), but I did want to freshen it up a bit.  So, I just took some tape and taped off the water in preparation for some spray paint.
I used two coats of an aqua blue I had left over.  Once they were dry, I removed the tape and used a brush and some leftover green paint (from the kids' bathroom) to paint the grass.
As for the table's base, I had decided stripes would be fun for it.  I laid out the stripes, but didn't like the way they looked so I modified it by having the stripes converge in the middle.  With the tape in place (and pressed firmly on to the wood), I went ahead with a couple quick coats of yellow spray paint (yep, also left over) and was looking at something like this.
I put a couple coats of poly over everything to protect it from Colton's trains, let it all dry over night, put the table back together, and moved it into the playroom.
pardon the missing track piece!
As I expected, Colton was really excited about the new addition.

Oh, and the best part of this little table is that the top flips over to another side, so when Colton inevitably finds his passion for Legos (I think all boys do that, right), we can just convert it to a Lego table...see honey, saving us money left and right!


April 12, 2012

Purged

Last week, I spent most of my free time here:
And here:
And even here:
Yep, it was spring cleaning time in our abode...or maybe a more appropriate term would be spring straightening and organizing...and I had many areas on my list of places to be hit up: our living room closet, the laundry room, the playroom, the kitchen, my closet.  Sadly, most of those places were on my list last April when I did the same thing, but oh well, I guess you can accumulate a lot of junk in a year!
I've developed a pretty good approach to this task, so luckily the whole process really didn't take as long as I had thought.  Basically, when going through the contents of any given closet, I have four categories: stuff to stay where it is, stuff to trash, and stuff to take to Goodwill, and stuff that needs to move somewhere else in our house.  It always amazes me how throwing out or donating just a few items really does clear up soooo much more space, and thus leaves us with a much more organized space.
I am also a big fan of baskets and labels for keeping things organized in the future.  I have found that just having the baskets is nice, but inevitably things get tossed all over the place over time.  However, if  I take the time to put a label on the basket to detail its contents, I am much more likely to take the extra few seconds when putting an item away to put it where it actually should go.  Like in my craft closet:

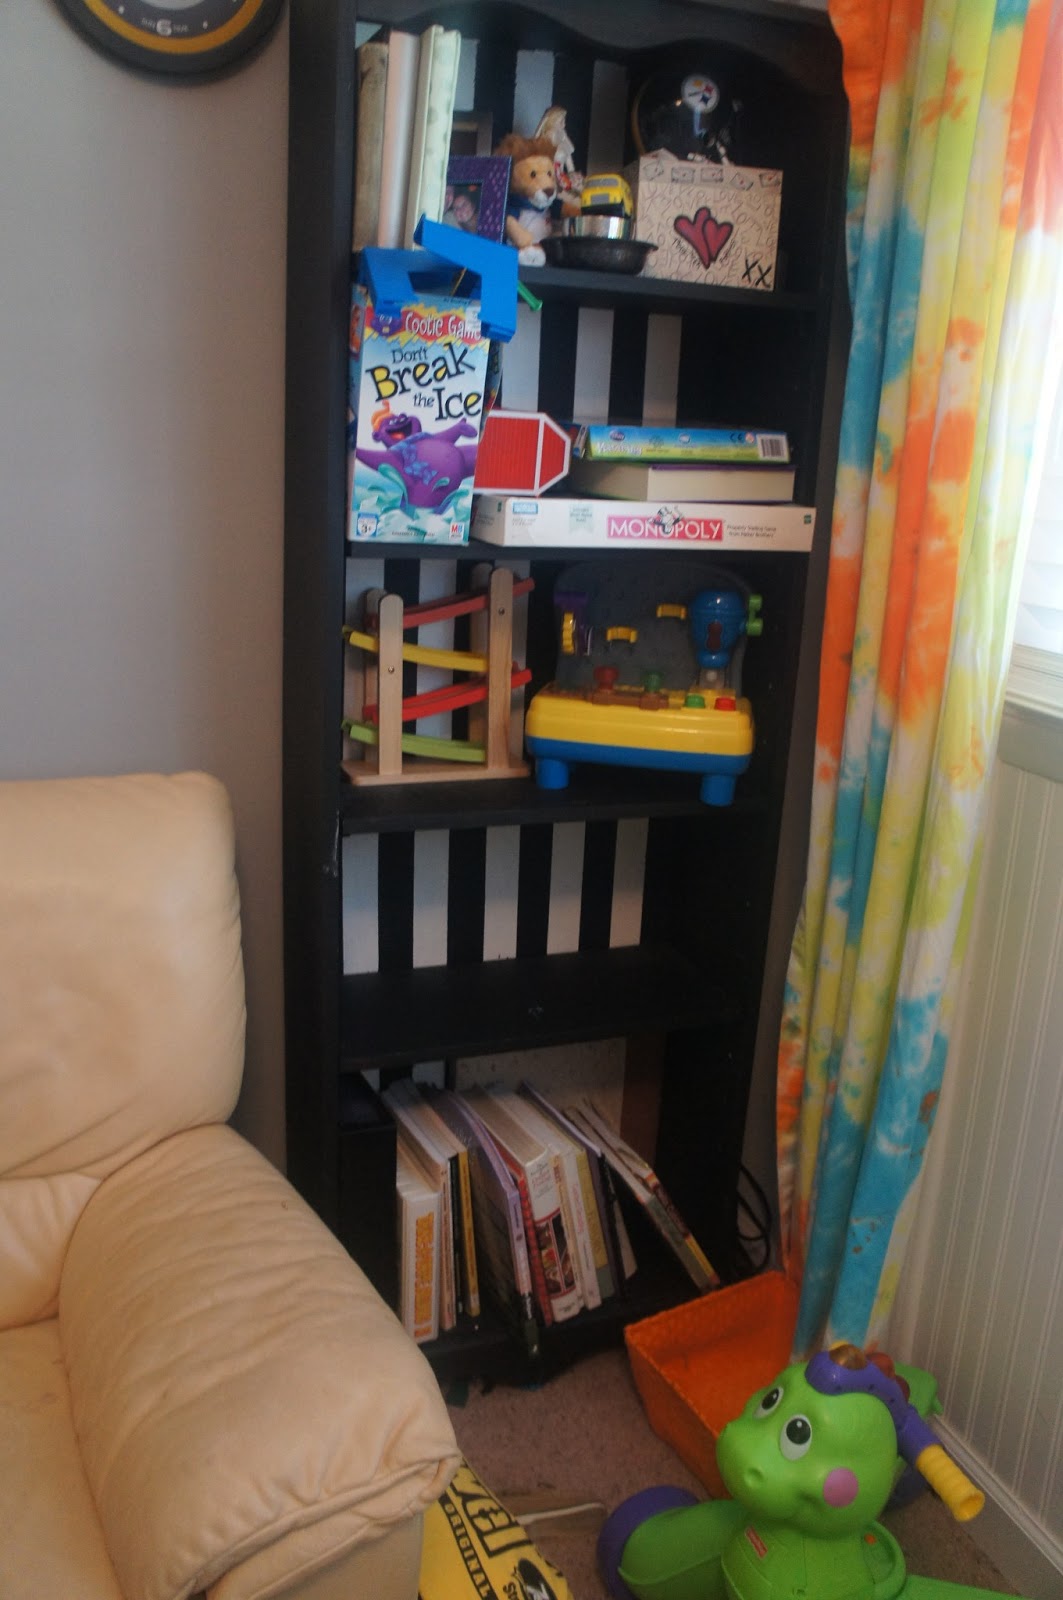
Our playroom was probably the most in need of some reorganization/straightening.  I mean, I expect the room to get a little messy from time to time, but these boys have a ridiculous amount of toys and the room quickly becomes a disaster.  I bought some smaller boxes to hold smaller toys like blocks, magnetic letters, and cars.  I also went ahead and donated my book collection (I'm a read it once and be done kind of girl, so I don't know why I've been holding on to most of these for the last 10ish years), and used the new-found shelf space to hold some of the bigger toys that Colton plays with frequently.  Finally, I stored some stuffed animals and other toys in our playroom ottomans.  Between all that, the toy box is now functional once again, instead of being ridiculously overflowing.

With my two-year-old's short attention span, I'm sure the room will get messy again pretty quickly, but I'm hoping that we will at least know where to put the stuff when it is time to clean it up, thus keeping it from reaching the ridiculous level!
Anybody else been doing some spring straightening?  Do you have a system you use too?  Do share...


December 28, 2011

DIY Playroom Reveal (FINALLY!!!)

I last posted about our playroom on July 14th.  At the time, I was hoping to be able to share with you all the reveal of the playroom in the next few days...well, clearly days turned into weeks and months, and here we are.  But guess what?!?  We finally have a fully functional, fully decorated playroom.


Along the way there were some changes that took place.  For one, our desk had to be included in the playroom's plans once we found out we were having Baby #2, and therefore that Colton would take over what used to be the office.  I would love to score a more stylish/fun chair for it one day and hopefully even a smaller desk, but that will have to wait a bit due to some budget constraints!  In that same vein, I had really hoped to find a good sleeper sofa for the space (our guest bedroom also disappeared when Colton took over that former space), but due to budget again, we settled for a hand-me-down from Josh's parents for now.  Again, one day that will hopefully be upgraded.
Despite the two aforementioned issues, I am pretty happy with how the room turned out...and what we spent on it (I'll do my best to provide you with a budget breakdown below).  The best part is that Colton LOVES the room...he is so much happier spending his free time down there with all of his toys at an arm's reach.  He barely notices if I'm even in the room with him, which is really nice for me to be able to sneak away and tackle something quickly, sit at the desk and conquer a craft project (especially since all of my supplies are conveniently stored in the room as well), or even just sit on the couch and relax for a bit!  With the colder weather and his brother arriving, I am very glad we got this room done in time!
the craft storage
And now for the promised source/budget list.  Although, please note that because most of the projects were DIY, the price on them are estimates.

  • Wall color: Behr Elephant Gray (FREE...painted when we first moved in)
  • ABC decal: Etsy shop $50
  • chalkboard/magnet wall: $10 (already owned the chalkboard paint, so had to purchase magnetic paint to mix with it)
  • clothesline art display: DIY (tutorial): $5
  • Storage: IKEA, but free to this project because we took it from Colton's nursery
  • Play table: IKEA, but again free to us because it was a gift from Colton's Aunt Genna last Hanukkah
  • Beanbag chairs: Target, $30
  • Play Mirror: DIY (tutorial): $10
  • Cork map: $15
  • Thumbtack Balls: DIY (tutorial): $15
  • Bookcase: already owned
  • Toy Box: hand-me-down and painted orange: $4 for spray paint
  • Couch: hand-me-down
  • Family Rules Sign: DIY (tutorial): $45
  • Curtains: already owned, but tie-dyed: $5
  • ottomans: Target, $20
  • Desk: had forever!
  • Handprint art: DIY (tutorial): $10
  • Mail Sorters: DIY from long ago (tutorial)
  • Closet organization: DIY (tutorial): FREE!
  • Crapload of toys: acquired from 1 1/2 years+ of being totally spoiled rotten
GRAND TOTAL:  approximately $220

Not bad for a whole room, huh?  

July 14, 2011

More DIY Playroom Fun

I had hoped to be able to give you the grand playroom reveal this week, but with no couch in place, some of the artwork is still not hung and the room is just not complete (fingers crossed for next week!).  Because the finale is delayed, I figured today would be a good time to fill you in on some of the details of some of those pieces still awaiting their final home because they were, of course, DIY!
The first is this guy:
The word "play" was an obvious choice for the playroom.  I started by painting the letters (coastal blue to be exact), but felt like the effect just wasn't what I wanted.  I considered painting a rectangular frame on the wall, but then I saw this old $5 Target mirror just hanging out without a purpose.  I decided its frame would be the perfect frame for my word, and I think I was right!  Just the right pizazz I was looking for!

My other recent addition is this project:
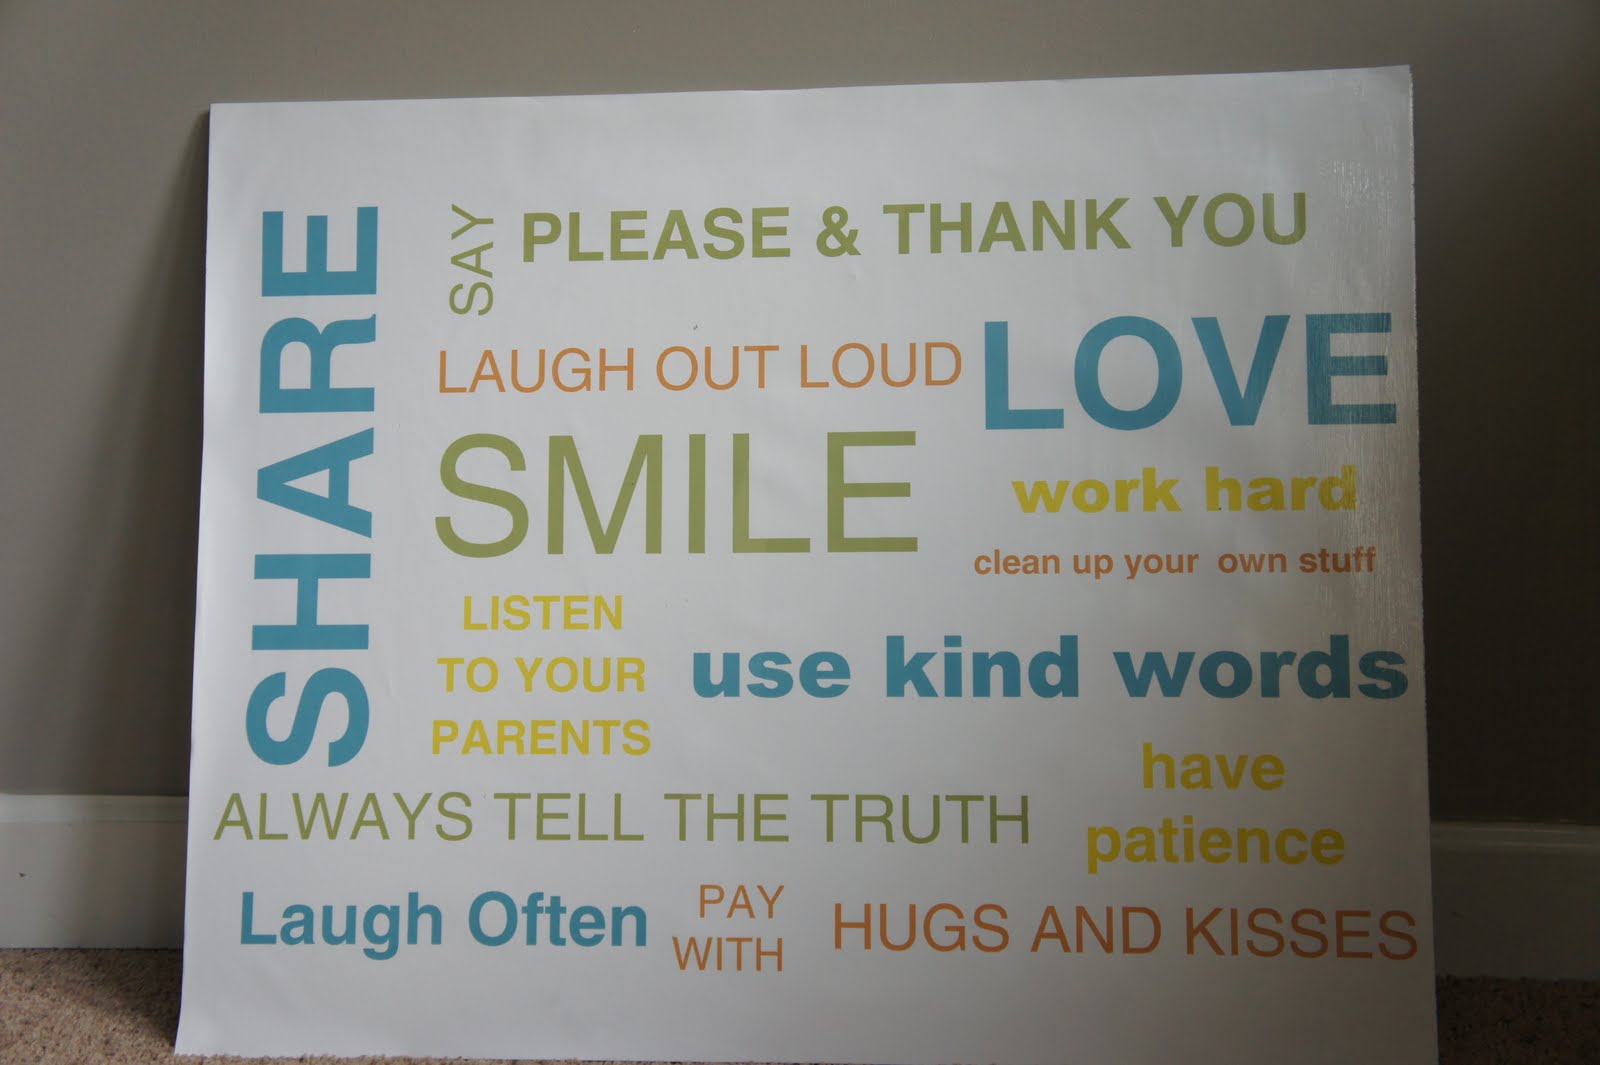
I had seen several "family rules" signs on Etsy and other sites to purchase, but decided to try my hand at my own.  It was actually fairly easy to design this one myself using Word.  I had researched online and found out that Subway Art is usually done in Helvectia font, but I didn't have that.  Luckily, it turns out Arial is in the same family, so I just used that instead.  I chose my phrases, played with the size of each, and adjusted my layout until I liked it.  Afterwards, I took it to Kinkos to have it blown up to 20x30 and then headed to Home Depot to have the nice man cut me a piece of 20x30 plywood.  
Once I had all my supplies, I painted the plywood white (although I don't know if this was a necessary step) and then used a few coats of mod podge to affix it to the wood.  Although I could have purchased one, I saved a few dollars by doing my own and I got to choose my own phrases, colors, etc, so I'd say it was a win-win!
So, that's it...the latest happenings in our playroom.  Now that all the elements are in place (well, except the coveted couch), hopefully the final product will be ready soon.  In the meantime, if you want to check out some of the other projects that went into making this room, you can read here.


July 5, 2011

DIY Thumbtack Balls

Wow!  It feels like a long time since I have had a quality DIY post to share with you all, but this one was well worth the wait...I hope you agree.  I made these to go in our evolving playroom, but these balls are perfect for just about any room that needs a little pizazz.  I spotted these on Pinterest:
thumbtack balls--cool
my inspiration image
                                             
I was so excited I didn't even take the time to read the original post, this may be totally the same or totally different.  Either way, you're inspired, too, huh?!?   So, let's get started, shall we?
The first step in any good project is rounding up your supplies.  For these, you will need the following:

  • foam balls (I used 4 inch and 3 inch diameter balls)
  • flat thumbtacks (to create 2 big balls and 4 small balls (anyone else giggling...come on, that's funny!), I needed about 5 packs of 400 thumbtacks)
  • spray paint in your colors
Yep, that's it!!!!  Now, your're ready to get started.  To begin, poke your thumbtacks into a line across the diameter of a foam ball.  Once that first line is in place, place another line of thumbtacks above the first line.  Use the first line as your guide and place these new thumbtacks in between two of the first line's creating a little overlap.  Once that line is done, create another line above in the same way. Confusing?  Hopefully, this picture will help:
Once you get the hang of it, just keep poking and filling in the ball until it is completely filled:
Kinda snazzy looking already, right?  But unfortunately, primary colors didn't quite meet my decorating scheme.  So, it was time for my favorite part of any process: spray painting.  I had a green and orange left over from another project, so luckily I just had to buy an aqua blue can.  Truthfully, I would have loved to use some yellow too (to fully incorporate all the colors of the room), but at $5 a can, I decided to sacrifice!  Anyways, I laid my balls out in three separate areas with their paints:

And after a few coats, my balls (hehe...still kind of funny) now look like this:

And in their home in the playroom:

So, that's it!!! Super easy, right?!?  Ready to go conquer your own balls?  Do it!  You won't regret it!


June 30, 2011

Playroom Progress

Whew!  When you attempt to totally DIY (or close enough) a room, it sure does take some time to complete!  Colton and I have been busy enjoying some time in his new playroom, and I am happy to report that the room appears to be nearing completion.  First, an updated to-do list:

  • get cable hooked up---should be happening this week...Hallelujah!
  • get adult seating for room---a friend has said she has a sleeper sofa available!!!! I have yet to see it, but it's a sleeper and it fits in our budget, so I'm thinking it will work
  • get toy box for Colton's bigger toys---retrieved, needs to be painted
  • get child seating for room ---added chair, now just need some floor pillows 
  • magnetic and/or chalkboard wall
  • artwork clothesline
  • ABC artwork
  • handprint wall art
  • curtain redo
  • flag bunting?
  • artwork for above couch
  • artwork for above tv
  • thumbtack balls for tv basket---started, stay tuned next week for a cool DIY
And now for the progress shots.  The most impressive tackling was the addition of our ABC wall.  You may recall that I decided to order this decal from Etsy.  As with most things Etsy, the colors of the decal were completely customizable, so I ordered it in our playroom colors of blue, green, yellow, and orange.  I am in L.O.V.E with my decal...it completely makes the room.  See?
Another project I tackled was adding some kid-friendly seating to this room.  Luckily, closing down a first grade classroom meant that I had a perfect kid chair that was homeless.  Well, not anymore...
Admittedly, the area is looking a bit bare right now, but I'm thinking some floor pillows in that corner should spruce it up and add some much-needed kid seating.  What do you all think?  You may also notice that I decided to hang my DIY hand print project in this little corner.  I had originally planned to hang it above our couch (when it finally arrives), but now I have another idea for that area.  
And finally, I conquered a little curtain redo.  The curtains were a boring white, which works well elsewhere, but in a playroom we needed a little more pizazz.  I had thought of dyeing the curtains, but couldn't pick which color I wanted to go with, so I had the crazy idea to tie-dye them.  Let's preface this by saying I would never consider tie-dyeing curtains for any room other than a playroom, but thought the blast of color and whimsy might be a fun addition here.  When I got to AC Moore to purchase my supplies, my decision was confirmed when the master kit (containing all the colors I needed and then some) was on sale for $9.99 (down from $29.99!), while each individual color sold for $6.99...hmm, looks like a sign to me.  
So, I got to washing, then rubber banding, dyeing, and then washing again (I did them each in 2 separate loads, although, I don't know if that's necessary).  Here's what they look like now (btw, all that washing and drying shrunk them up a bit, and now they don't reach the floor anymore...oh well):


So, now for my favorite part...a little glimpse of our updated playroom look:
It's getting there, right?  And a glimpse of the other side of the room, which definitely needs much more attention:

What do you guys think?  Fan of the tie-dye curtains?  Can you think of anything else the room needs?  Thanks for all your input; I really do appreciate it!


June 16, 2011

Playroom Continued

Work on the playroom continued this past weekend, and I am happy to report it is finally starting to come together.  It seems like all of the details are in place and now we just need the big elements in place.  Here's an updated look at the to-do list for the room (again I went ahead and noted the updates in pink):


  • get cable hooked up
  • get adult seating for room (possibly sleeper sofa---or Genna's sofa/loveseat in August...can I be that patient?)
  • get toy box for Colton's bigger toys---coming from Genna, will need to be painted
  • get child seating for room (beanbag chairs? floor cushions? poofs?)
  • magnetic and/or chalkboard wall
  • artwork clothesline
  • ABC artwork-ordered
  • handprint wall art
  • curtain redo...dye? paint? replace?
  • flag bunting?
By the way, anyone else tend to add things to your to-do list as others get crossed off?  I swear I don't know how I ever get anything done!

But I digress...back to the list and our updates, you may notice I conquered a couple projects this weekend.  The first was painting our magnetic chalkboard wall.  I had originally planned on doing two separate walls: one magnetic and one chalkboard, but then had a genius moment and wondered if I could just combine the two paints.  Turns out it wasn't that genius because printed right on the box for the magnetic paint was the directions to make a magnetic chalkboard surface....oh well, at least I could do it, right?  I had also considered making the wall ceiling height, but even I can't reach those darn ceiling tops without a ladder, so I figured our little children should not be tempted to do so either.  Instead, I opted to tape the wall off right under our light switch (I didn't measure, but I'm thinking it's about 3 feet tall) and get to painting.  The directions said to apply 3 thin coats of magnetic primer first.  Applying the stuff was easy using a foam roller, but holy shite...let me tell you, that stuff STINKS!  Make sure you are applying it in a well ventilated room because WHOA!  Once those three coats dried, I applied three thin coats of chalkboard paint on top.  Here is the finished product:
pardon my crappy artwork

I also tackled my handprint art project this weekend.  My original inspiration was this artwork from Land of Nod:
                                                                      
But I knew I could DIY my own, so I did!  I just bought 4 canvases...I bought the 11x14 ones even though honestly I do like the square look of these better, but the 8x8 canvases were about $10 each, which was a little steep for my project.  Once the canvases were mine, I painted each one a different color: orange, yellow, lime green, and coastal blue.

After two coats, one with vertical brush strokes and the next with horizontal brush strokes, my canvases were ready for some handprints.  The Land of Nod art features handprints from different stages of the same child's life, but that would be pretty hard to accomplish with a 14 month old.  Instead, I decided to do one canvas for each of our family members, including Chipper.  The idea sounded good in theory, but I was a little naive to how much Chipper would not like having his paw painted (I should have known...the groomers always comment on how much he hates having his paws done) or how hard it would be to get a good handprint from Colton.  They certainly are not perfect, especially Chipper's whose looks a white blob, but I think their imperfections add character.  I plan to hang these over the couch once it is in the room, so for now, they are waiting patiently one the floor, but this is what the final product looks like:

And now for the really fun part.  Here's a look at our progress so far.  As a reminder, here is what the playroom looked like when we started:
And a few projects later:

Progress, right?  What do you all think?