Showing posts with label paint. Show all posts

December 12, 2013

Handmade Holidays Round 2: Painted Mason Jars

This week, I've been busy showing you all of my holiday DIY projects.  Well, today's is a bit of a cheat.  Because I didn't actually make these beauties for the holidays (as you can probably tell by the colors!).   At the same time that I've been busy decking our halls, I've also been splitting time with prepping for a client's rainbow themed (with a modern twist) first birthday party.  But while I painted these in pretty rainbow colors, you could do them in absolutely any color and totally use them as holiday decor.

After all, all I needed to make them was some mason jars and acrylic paint.  Just squirt adequate paint into the jar and let it drip down to the bottom.  Then lay the jar on its side (on a piece of newspaper).  The tutorial I read said to rotate the jar every ten minutes for 2 hours.  Well, I'm not that patient/precise, but I did rotate mine every so often and once I felt like the paint was as far around as I could get it, I tipped them upside down (mouth down) to attempt to coat the tops.

Truth be told, I ended up having to do a second day's worth of rotations because my paint just didn't reach a few places the first time around.  On day 2, though, I spot treated instead of using a general approach and was able to get anywhere I  missed.  Try to resist the urge to whip out a paint brush to spread the paint around because it will take away the glossy look (which I happen to think makes the jars!).


November 21, 2013

DIY Gold Mercury and Gold Ombre

Um...how is Thanksgiving only a week away?!?  It's even relatively late this year, and I'm still in shock that we're already here!!!  We will be hosting the big dinner at our house this year, so I've been busy plotting menu, decor, seating, and all things Turkey Day!
As I started coming up with inspiration for place settings and tablescapes, I was instantly drawn to metallics, especially when mixed with natural elements (kind of like our mantle...which works so I won't have to worry about changing it!).  I actually have burlap tablecloths on hand, so I won't have to worry about that part either.  But I did need some things for table centerpieces.
So I headed out to the Dollar Store and picked up some taller vases and smaller vases.  I also picked up a can of gold spray paint, so I could get all this glass looking gold!
While I did find some tutorials for the mercury, I pretty much winged it on both projects...and they both turned out pretty good (I think).  So here's the basics of how to do them:
Gold Mercury
Spray the inside of your container with gold spray paint.  Repeat 3-4 times.  Allow to dry 10 minutes or so in between coats.  Allow them to dry for at least an hour. Use a spray bottle to squirt apple cider vinegar into the vases or just put a little apple cider vinegar on a paper towel.  Either way, you're aiming for random areas where the paint will flake off when scrubbed.  I had read of people struggling, but mine actually came off easily...almost too easily, so if yours does that, just scrub at your own discretion.  Spray the inside again with gold paint, and then repeat the vinegar removal process, choosing some new spots and some old spots.  I did this 3 more times total, but just kind of wing it and stop when you're satisfied with how your "mercury" looks.  I suggest putting a candle in it (I used an electric one), so you can really see how it will look all lit up when trying to decide if you're done!


Gold Ombre
These were inspired by some silver ombre drinking glasses I saw at Target.  I loved them, but I'm not really doing silver...and Josh probably wouldn't have been a fan of me buying all new drinking glasses for Thanksgiving when we already have some!  So, I decided to recreate the look and make them vases instead.  So simple by the way.  Basically, I taped off each vase at about 4 inches down (I didn't measure...just eyeballed it) and gave it few coats of gold spray paint, letting it dry about 10 minutes in between.  Then, I taped off another few inches down, and just gave it one light coat of spray paint...from about a foot away... and voila!
I was so excited about my new gold accessories that I decided to give my Thanksgiving table (well one of them...we have 16 people coming so far, so we're going to need to bring in a couple more!) a test run.  
It still has a way to go obviously...like adding actual flowers to the vases and candles to the votives, jazzing up the runner (which is really just wrapping paper), adding some pizazz to the place settings, and hopefully even finding better/larger pumpkins (or something else) for the center, but I think it's working out pretty well!  And considering everything was either previously owned or from the Dollar Store, I'm feeling pretty good about our budget for it as well:)  With a week to go, I'm thinking we may actually be ready when the big day arrives!


September 5, 2013

Guest Bath Redo

When I make my mind up on something, I'm pretty much unstoppable.  Ask Josh (he loves it...sarcasm).  Well, a couple weeks ago I made up mind that our guest bathroom was in need of a makeover.  And guess what?!?  Said makeover is now complete.  Step one was painting the walls navy blue (Benjamin Moore Midnight Navy) and step 2 was accessorizing.  I had planned to do the bathroom with yellow accents, but when I spotted this Nate Berkus shower curtain at Target (for $25!), I totally changed direction.

I went with the towels that matched (and added a much-needed towel hook by the sink).  I also picked up a fun white soap pump from Target and a navy blue trash can (from Bed Bath and Beyond) and bath mat (from Target...the Threshold one, not the awful Restyle one!).


But I had the most fun with the "art."  I had these frames and shells on hand from a display we used to have hanging over our bar in the living room.  I always liked the idea, but it didn't really fit the space we used to have it in (now inhabited by my DIY chevron art).  When I took it down, I knew I would reuse it somewhere eventually.  So after a few coats of spray paint to the frames, here it is now.


I also created this little print in Photoshop, printed it out, and put it in a frame.  As pathetic as it is, it may just be my favorite part of the whole room!

And I also used  one of those porcelain pens to jazz up a plain white bowl a bit.

After putting some soaps in a cute jug, I really like the look of the shelves.


Originally I had planned to frame out the mirror, but once I was done with the makeover, it doesn't seem as necessary.  I'll probably get around to it one day, but for now, we're going to consider this room dones-o!
 $100 and a couple weeks of intermittent work/shopping and we went from this...


To this...


Success?

August 28, 2013

In the Navy...

Well, I did it!  Just like I promised/plotted last week, I have finally gotten around to painting the guest bathroom.

In case you're curious, I used Behr Paint and Primer in one color-matched to Benjamin Moore's Midnight Navy.  Because the color is so dark, it did take me a few coats (and in some places, I even had to go back a fourth time!) to get nice, even coverage.  But the good news is: I think I like it!  It's definitely a more bold choice than I would usually go with, but I think we needed something different!  Here's what it looked like before to jog your memory:

And now comes the part I love most (and that Josh dreads): accessorizing!  Translation: shopping!  Although, I actually have a couple DIY projects up my sleeves to hopefully save us some moolah!  I had planned to go with yellow and white, but then I found a shower curtain at Target that I fell in love with, so we'll see what I come up with!  The curtain is coral and white, so it will still work with the navy.


What do you guys think of the navy?  Good choice?

August 1, 2013

DiY Painted Door Mat

Since the boys have been in camp, I have been working really hard to clean out our laundry closet and playroom.  And lo and behold, in doing so, I have discovered tons of things I had long forgotten we even owned.  Like a plain door mat I had purchased at IKEA...back in October of 2011!!!!

Considering our current door mat was faded and worn down, I was pretty stoked.  And immediately got to work making that plain ole door mat not so plain.  I couldn't really decide what I wanted to do with it, so I went with my old faithful: chevron.  I figured it would give people a pretty good preview of what to expect when entering our house (yeah, there's a lot of chevron in here!).  
I'm lazy. I'm impatient.  I just eyeballed my chevron with painter's tape.
Of course now I notice the funky spot on bottom left, but I didn't notice it before I painted.  Oh well...it turned out ok!  I spray painted it black and let it sit for a few days.  But I knew it needed something more.  And I figured an "H" would be the perfect addition.  Josh is a little paranoid about me giving away too much personal information on this blog, but H happens to be the initial of our last name (in case you hadn't figured that out).  I had one of the Michaels H's on hand that I had covered in yarn for our winter mantle, so I traced that on to poster board, cut it out, and used it as my stencil. 
I whipped out some of the left over blue paint I had from our front door and filled that H in!  Because of the texture of the mat, I couldn't really brush it on, but instead had to sponge it (I was using a foam brush).  I got it all filled in though and was pretty pleased with the result.  So pleased that I decided to finish this guy off with some fabric protectant and go ahead and put it out on the front porch.

And now the boys have a new game every time we leave the house.  Colton stops, touches the H, and says "H for _____ (our last name)," while Levi follows behind, points, and says H.  We're nothing if not creatures of habit around here!
And I must say it seems to have finally completed our porch's mini-transformation (pardon the very thirsty plants in the planters!)...


July 24, 2013

DIY Painted Curtains

Over the last few weeks, Colton's room has received quite a bit of updating.  We upcycled an ottoman to give him some shoe storage and made him a sturdier, better looking, bigger tee pee.  And in doing both projects, we also created the need for new curtains because I used some of the fabric from his old curtains in each of the previous projects!  In fairness, we needed new curtains in there anyway, but ripping the old ones down and tearing them up pretty much sealed the deal!!!
I don't know about you all, but I always have the hardest time finding curtains that I like.  Let's modify that actually.  I can usually find curtains that I like, but not at a price point that I like.  I looked in every store I could think of...both real and online...and came up empty-handed.  So, then I turned to Plan B: buy some basic navy curtains from Target and jazz them up somehow.


Can I tell you how easy these were?!?  I've stenciled curtains before, and while I liked the result, it was a long, painful process and I knew I didn't want to go there again...at least not now.  Luckily, I found an inspiration image on Pinterest and decided to just try my hand at it.  I painted a bunch of random circles on each curtain panel.  Some were big; some were small.  I just went with it, and in the end, this is what it looked like (pardon crappy, blurry iPhone pic):

I was a little worried it was too busy, but figured/hoped that once they were hung and bunched it would work itself out.  You be the judge, but I think it did.  In fact, I'm pretty darn pleased with the result.  High impact.  Affordable (like $20 for the pair). And easy (like an hour's work total!!!  sure beats the heck out of stenciling...trust me!).  If you need more views to make your call, I leave you with these...


July 15, 2013

Hello.


How do you like that new addition to our front porch?
Personally, I'm quite happy with it!  I feel like it's fun, but still classy...ya know, like me!
There's really no great DIY story here.  I attempted to DIY it.  I printed out "hello" in one of my favorite fonts, traced it on to a piece of wood we had laying around, and then borrowed a friend's jigsaw and had Josh attempt to cut it.  But, it broke (the wood, not the jigsaw).
So, then I just ordered an unfinished version I found on Etsy.  There were also painted ones, but I really couldn't decided what color I wanted to go with.  Plus, the unfinished version was only about $20 with shipping and I figured I could paint it once it got here...which I did.  I spray painted a couple coats of black on there and hung the baby up (with heavy duty tabs because I was too impatient to wait for Josh to drill holes into the brick...and so far it seems to be working).
And now we have a lovely welcome each time we get home.  Hello!


June 20, 2013

Budget DIY Curtain Rods

Yesterday I shared with you my Target tablecloth turned $8 curtain panels.  As I closed out the post, I shared with you that as happy as I was to have found such an affordable window solution, I was a little shocked when it then came time to hang those babies up.  Bay window hardware is pretty expensive, at least for my standards, so I immediately started looking for a DIY solution.  Any search of Pinterest, Google, etc. will bring up the idea of using 10 foot electrical conduit sections as rods.  So, that's where I started.  I picked up two 10-foot sections and some white spray paint (because I wanted my rods to be white) and figured I was done.

Well, wrong!  Obviously, you need more than just rods to hang curtains.  Those rods need brackets.  And the rods need finials.  And the corners of a bay window need to be dealt with as well.  Through some trial and error, lucky guesses, and some research, we did manage to make our conduit work, and hopefully if you're reading this, I can save you a bunch of trouble by just giving you our results!
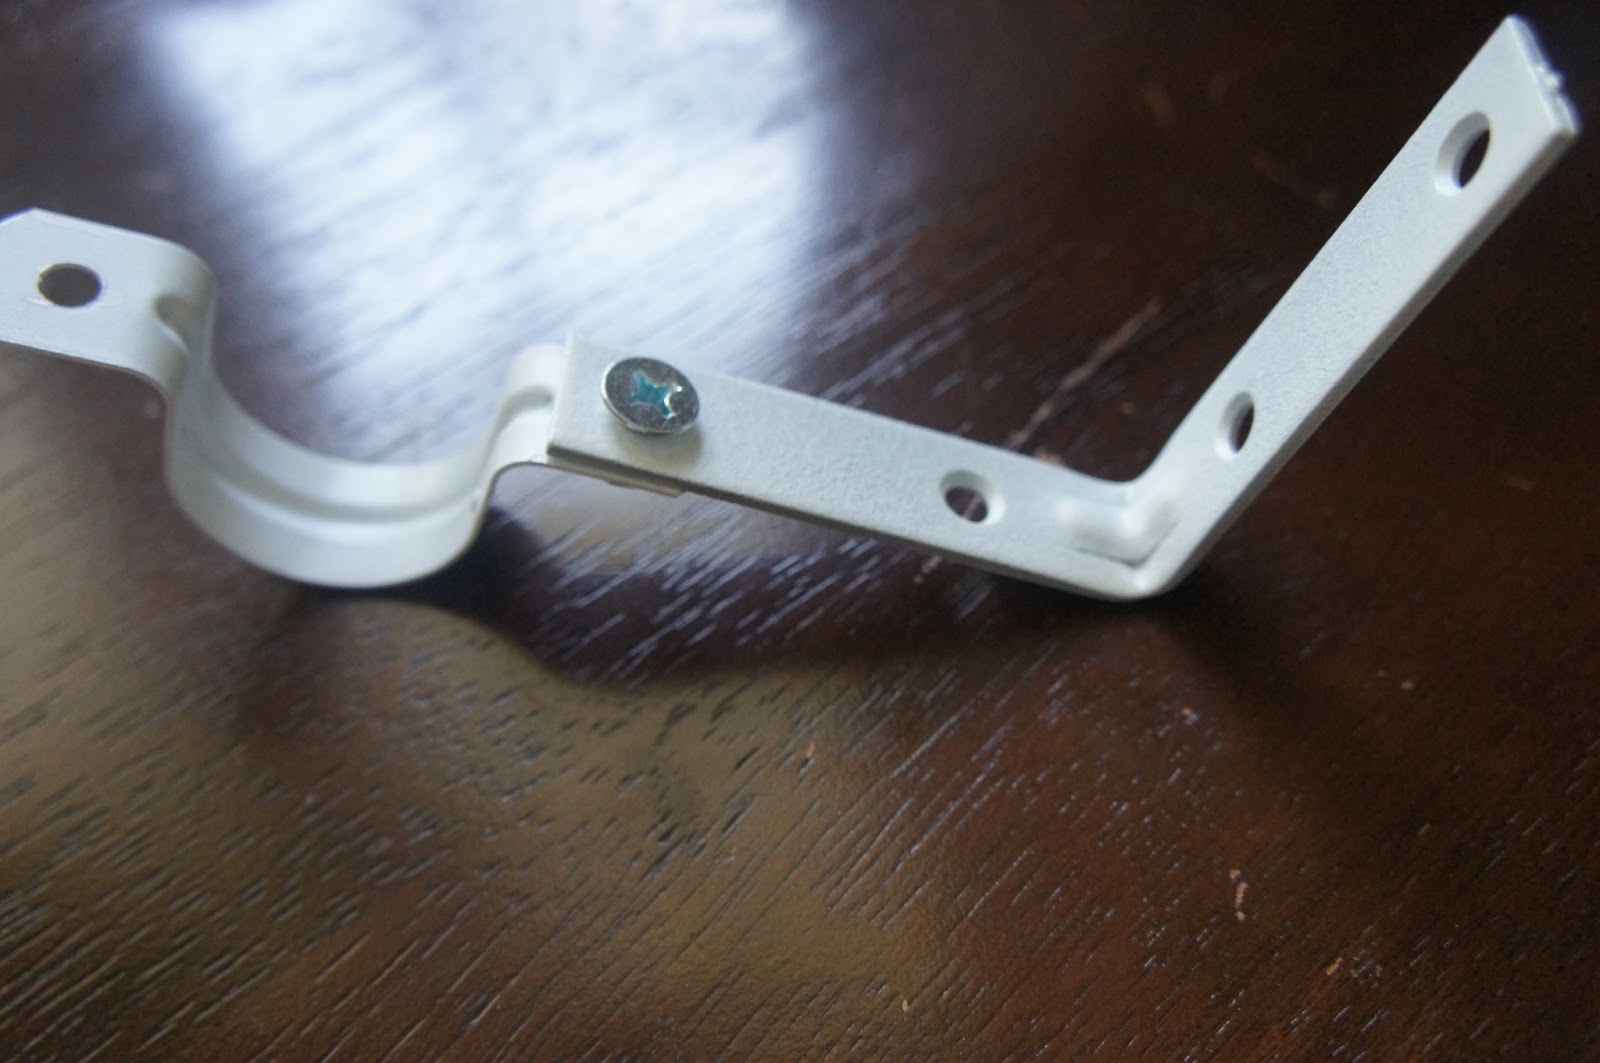
First up: brackets.  The problem with conduit is that it is 1-inch round.  Most standard brackets that they sell in the window hardware section aren't going to fit that.  Our solution: some L-brackets, conduit straps, and nuts/bolts to attach them.  I spray painted everything white before taking this picture, but here's what it looked like all put together.
And here's what it looks like actually on the wall.  By the way, the screws used to put them in the wall were included in the L-bracket packs (sold in fours), so don't worry about having to buy something else.
Next up: finials.  I hit up the wood section of my craft store thinking I'd find something that would surely work.  Sure enough, there were 2 inch balls (with a flat base) there that would be the perfect finial!  But, most tutorials I had read suggested that you would have to insert a dowel into the conduit or rig up some other system in order to screw the finial on to the rod (as you typically do with curtain rods).  Well, I'm lazy...and a big fan of my glue gun...and kind of thought that my best DIY buddy could get the job done.  I picked up some flat discs to glue the balls to.  Here they are all painted white and put together.
And then I just used my trusty glue gun again to attach the disc part to the ends of the curtain rods.
Looks like a finial, right?!?
OK, so finally the corners.  The tutorials I had read suggested two things for the corners: either bending the conduit to the right angle or using PVC corners for them.  Well, Josh and the man at Home Depot swore the conduit wouldn't just bend, so we didn't even try that.  Instead, I had Josh cut the 10-foot pipe into 3 sections for each window and figured I'd use the PVC corners.  Well, those things are only sold in 45-degree and 90-degree angles...neither of which is the angle of our bay window corners.  I was a little worried we were stumped, but I kind of figured that the curtains would be hanging in the corners anyway, meaning no one would see if the corners were actually connected.  I was even more worried that the brackets would make it impossible for the curtains to hang in the corners.  

But, I crossed my fingers and hung the curtains anyway.  And IT WORKED!
When it was all said and done, Josh asked me if we had even saved any money by doing it that way.  Well, dear skeptical, cheapo husband, here's the breakdown for you (and anyone else interested).
Supplies for one bay window (all prices are rounded for simplicity):
10-foot conduit section: $4
White spray paint: $4
2x 2 inch balls: $4
1 pack wooden discs: $2
4 pack L brackets and screws: $5
4 conduit straps: $4
Nuts/bolts: $3
       Total cost: $26                                            Typical cost of bay window hardware: $50-$80

Pretty significant savings, eh?  And honestly, aesthetically, I like ours more than all of the versions I saw in stores!  Woo hoo!  I just love a successful project!


June 3, 2013

ORBing It Up

If you stopped by yesterday, you saw that I gave my front door a nice blue painting.  And in the process, I decided to finally bite the bullet and ORB my door handles.  For those of you not as familiar with the DIY world (like my husband who at first totally balked at the fact that I was going to spray paint our door handles), ORB is short for oil-rubbed bronze, a metallic spray paint and primer in one.  I have seen tons of tutorials on spray painting door handles and considering ours were old, brassy, and in some cases mix-matched with silver (yuck!), I knew this was  a project I had to take on!
So here's the thing.  Painting them is actually amazingly easy.  You sand them down, give them a few light coats of spray paint, and voila...pretty "new" knobs and other door hardware!


However, I did learn a few things along the way.
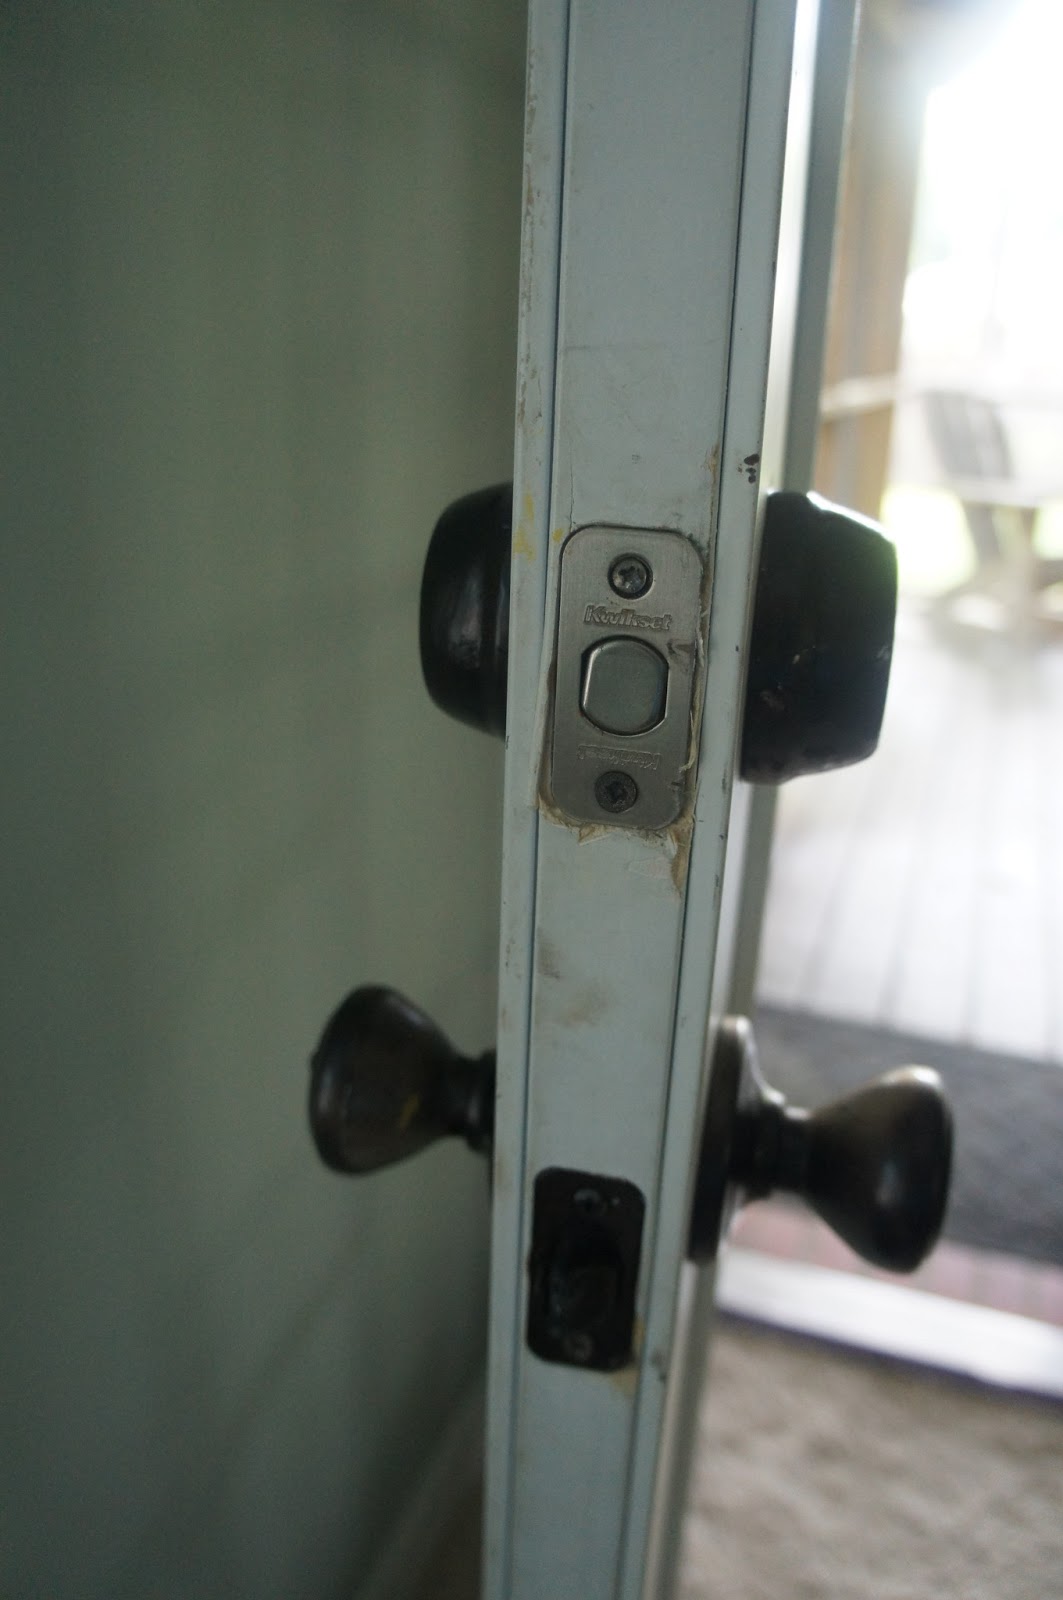
Primarily, when removing the knobs, especially if you're removing lots of pieces, make sure to keep track of which screws go with which parts.  The first time I did a set I did our front door.  I took off the deadbolt, the door handle, the stoppers, and the latchy thing we have (I don't know what it's technically called!).  Anyways, I was just going with it and was all excited that it had been so easy.  Well, then I started putting them back on.  AN HOUR AND A HALF LATER, after countless redos when certain screws wouldn't work in places, I had all the pieces back in place.  The next time I did both living room doors and the front storm door handle.  I removed each section one at a time, laid it out to be painted with its pieces, and then once they were dry, picked up one section at a time to put it back on.  20 minutes total for all three!  Much better than that rookie failure!  Lesson learned!

Not only did that first day take so long to get back on, I had another major setback that first attempt.  Our doors are really old and, in places, our knobs are pretty stuck in there!  On our front door, I got the actual door handle removed, but could not for the life of me, get the freaking stopper part that actually goes into the frame out.  Not a big deal...until Levi closed the door...and then I later went to put the parts back on and realized I couldn't actually open the door without a handle.  Luckily, we have a quick thinking, kind neighbor who came over with a spare knob and opened the door for me!  Whew...second lesson learned: don't close a door that doesn't have a handle!

And speaking of that part that wouldn't come off.  Because of it, I had to go back to Home Depot and picked up a can of oil-rubbed bronze paint.  It was $8, but was so worth it.  Not only did it allow me to paint the parts I couldn't actually remove, but mainly it was available to help me with touch ups...parts that got a little nicked as I tried to reinstall or even parts that I somehow didn't spray as completely because weird angles.  I just used a small paint brush and got those places with a few light coats as well.  I recommend putting it on your door knob handle painting supply list from the start!

So, all in all, I think ORBing was a major success.  If, like me, this has been on your project radar for awhile, I highly suggest going for it!  And now that I have a pretty good system going, I can't wait to eventually tackle every handle in the house.  


May 31, 2013

We've Got the Blues...In a Good Way...Maybe

A couple of weeks ago, the professionals came out and gave our front flower beds a much-needed major overhaul.  And once it was complete, I decided to play around in Photoshop and do some mock-ups on our house.  The image was pretty crappy, BUT it did confirm a few things I had long been suspecting.  1.  We need shutters.  2.  The front "porch" could really use some accessories.  3.  A blue front door is happening.
And with that information in hand, I quickly got myself to Home Depot and picked up a quart of paint.  I went with Behr Paint and Primer in One color-matched to Martha Stewart's Aegean Blue.
I love me a good painting project and painting the front door was about as easy and painless as they come!  I knew I would be Orbing the handles (more on that tomorrow), so I didn't even worry about taping them off and just went with it.  About 2 hours and 3 coats later, I had a nice, fresh blue door (and yes, you can barely tell the door is blue because of the lighting and yes, you can already see the orbed handles in this picture because I didn't take the time to take a picture of the blue door on the one day that it still maintained its old brassy handles).

But, of course, I couldn't stop there.  In my photoshop image, I loved the pop of blue that the front door gave us.  But in this version, the white storm door was totally blocking out the pretty blue door.  So I did what any logical person would do.  A couple days later, I painted the storm door as well.  Because I had paint and primer in one, I just sanded the door down lightly and got my paint on once again.
I'm a really lazy/impatient/eager project person, so I didn't bother to tape off the glass.  I probably should have, but a little wipe down with some goo gone at the end saved the day!  Oh and this time I just took the handle off and orbed it while I was painting the door, so these final shots definitely show the new handle as well!
close up

a little further out

and still a little further out

So now our door is definitely blue.  And I'm pretty sure I really like it!  It reminds me of this slightly hoochy dress I wore to a party a few weeks back.  I knew I looked pretty hot in the dress (something I don't usually say!), but I still felt a little "out there" if you know what I mean.  I like the door and think it looks happy, but it's a pretty bold choice, especially in our neighborhood of more traditional homes, so I feel a bit self-conscious about it.  As a boost to my confidence, though, Josh has yet to complain about it...which usually means he likes it...and a few visitors have told me they like it...so we're going with it!
As I reminder, here is our door as its former self...


What do you all think?