Showing posts with label outdoors. Show all posts

April 14, 2014

Green Thumb

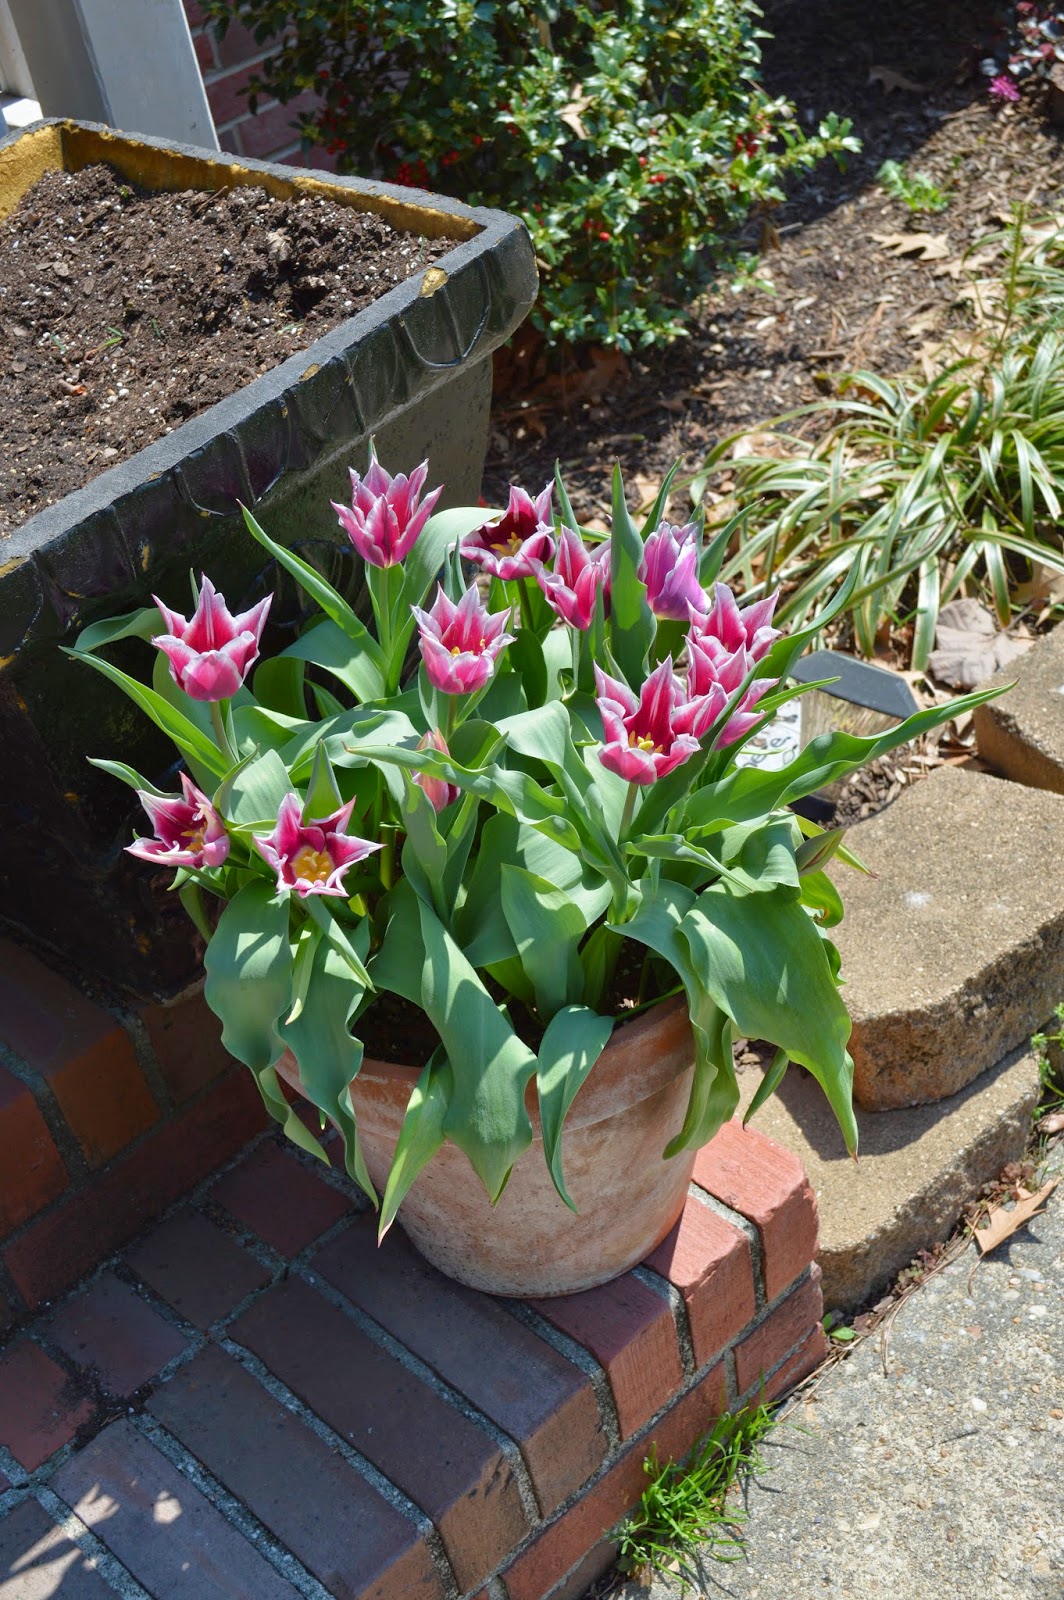
Tulips are my favorite flower.  Every Spring, I have hunted around town for a tulips to add to our front porch planters.  And every Spring, I get frustrated because I can never find what I am after: just a simple cluster of tulips!
Well, way back in the Fall, I saw an idea on Pinterest to plant my own tulip bulbs then, put them in shed  for the 6 months or so, and wait for Spring!  So I went out and bought some pots and bulbs, planted them, and waited.  I typically have a pretty black thumb, so I didn't really have huge hopes for this project.  Especially because part of the instructions said to water them occasionally over the fall/winter, and I completely forgot to do that (luckily, at least in this case, our shed does leak a little, so they did get a bit of water). 
But, lo and behold, my heart is aflutter because look what we have now!


Amazing...at least to me! This is probably the first, and possibly the last, time I managed to produce positive results in the gardening department, so I figure I should really savor it!

October 18, 2013

Leaves, Pinestraw, and Such

All of last week,  some "coastal system" with tons of rain and wind went up past us and then was really kind and came back down to get us with another dose.  We didn't see the sunshine for a whole week, and when it all finally cleared out, we were left with a yard full of leaves, pinestraw, sticks, pinecones, and other fun!
keep in mind that is about 1/20th of our yard!!!

In the past, we have had a lawn maintenance company that took care of our yard regularly and would then take care of these big cleanups. But this year, Josh inherited a riding lawn mower and has been taking care of our lawn cutting himself, which means there is no lawn company scheduled to clean up the mess.
And considering I am home more, I figured it would be a very nice wife thing of me to do to take care of the leaf clean up during nap and school time.  Well, I figured it would take more than one nap time, but I didn't quite realize it would be a whole week affair.  All project were on hold while I spent just about every free minute I had tackling our beast of a fall yard.
The whole time I was doing it I had a few things that kept running through my mind.  Primarily was probably "man I hate this freaking yard"/"our next house will not have this big of a yard" and other things of that nature (no, we are not moving any time soon, but we have begun talking about the possibility and I am now adamant that we will downsize our yard the next go around!).  Secondly was "Josh better really appreciate this/be impressed when he gets home" (for the record, he was...).  And finally, I kept thinking there has to be some really good DIY leaf raking tips I could find on Pinterest...I never did find any...unless you count the fact that I quickly learned pinestraw is harder to rake than leaves, but much easier to bag.  Other than that, there's really just the pile-rake-pile again-rake again method that I seemed to have perfected.
As of writing this, our yard clean up has taken about 10 hours, 41 bags and counting,  one painful blister on my thumb, and a very, very sore back.  Josh and the boys did bail me out a bit tonight, leaving me with about an hour of work tomorrow until this project is officially complete (hopefully!)...


  But there's always a plus side, right?!?  Or at least I always try to look for one.   And in this case, the plus side was that I managed to get a whole big pile of leaves that the boys LOVED playing in.  We even had friends over today and all the boys went crazy in there.  Can't beat good ole fashioned free fun, eh?!?


If I'm going to be honest, though, as nice as watching them play was, I must say in this case the cons definitely outweighed the pros!  This project has been completely exhausting and time-consuming, and now that my "I am woman; hear me roar" moment is over, I will most certainly pay someone to do it in the future...especially considering the yard is already quickly filling up again.  
So, yeah, I'm pretty much totally over our yard. Anyone else been raking up a storm this week?  Or were you smart enough to just hire someone?


August 1, 2013

DiY Painted Door Mat

Since the boys have been in camp, I have been working really hard to clean out our laundry closet and playroom.  And lo and behold, in doing so, I have discovered tons of things I had long forgotten we even owned.  Like a plain door mat I had purchased at IKEA...back in October of 2011!!!!

Considering our current door mat was faded and worn down, I was pretty stoked.  And immediately got to work making that plain ole door mat not so plain.  I couldn't really decide what I wanted to do with it, so I went with my old faithful: chevron.  I figured it would give people a pretty good preview of what to expect when entering our house (yeah, there's a lot of chevron in here!).  
I'm lazy. I'm impatient.  I just eyeballed my chevron with painter's tape.
Of course now I notice the funky spot on bottom left, but I didn't notice it before I painted.  Oh well...it turned out ok!  I spray painted it black and let it sit for a few days.  But I knew it needed something more.  And I figured an "H" would be the perfect addition.  Josh is a little paranoid about me giving away too much personal information on this blog, but H happens to be the initial of our last name (in case you hadn't figured that out).  I had one of the Michaels H's on hand that I had covered in yarn for our winter mantle, so I traced that on to poster board, cut it out, and used it as my stencil. 
I whipped out some of the left over blue paint I had from our front door and filled that H in!  Because of the texture of the mat, I couldn't really brush it on, but instead had to sponge it (I was using a foam brush).  I got it all filled in though and was pretty pleased with the result.  So pleased that I decided to finish this guy off with some fabric protectant and go ahead and put it out on the front porch.

And now the boys have a new game every time we leave the house.  Colton stops, touches the H, and says "H for _____ (our last name)," while Levi follows behind, points, and says H.  We're nothing if not creatures of habit around here!
And I must say it seems to have finally completed our porch's mini-transformation (pardon the very thirsty plants in the planters!)...


July 15, 2013

Hello.


How do you like that new addition to our front porch?
Personally, I'm quite happy with it!  I feel like it's fun, but still classy...ya know, like me!
There's really no great DIY story here.  I attempted to DIY it.  I printed out "hello" in one of my favorite fonts, traced it on to a piece of wood we had laying around, and then borrowed a friend's jigsaw and had Josh attempt to cut it.  But, it broke (the wood, not the jigsaw).
So, then I just ordered an unfinished version I found on Etsy.  There were also painted ones, but I really couldn't decided what color I wanted to go with.  Plus, the unfinished version was only about $20 with shipping and I figured I could paint it once it got here...which I did.  I spray painted a couple coats of black on there and hung the baby up (with heavy duty tabs because I was too impatient to wait for Josh to drill holes into the brick...and so far it seems to be working).
And now we have a lovely welcome each time we get home.  Hello!


May 31, 2013

We've Got the Blues...In a Good Way...Maybe

A couple of weeks ago, the professionals came out and gave our front flower beds a much-needed major overhaul.  And once it was complete, I decided to play around in Photoshop and do some mock-ups on our house.  The image was pretty crappy, BUT it did confirm a few things I had long been suspecting.  1.  We need shutters.  2.  The front "porch" could really use some accessories.  3.  A blue front door is happening.
And with that information in hand, I quickly got myself to Home Depot and picked up a quart of paint.  I went with Behr Paint and Primer in One color-matched to Martha Stewart's Aegean Blue.
I love me a good painting project and painting the front door was about as easy and painless as they come!  I knew I would be Orbing the handles (more on that tomorrow), so I didn't even worry about taping them off and just went with it.  About 2 hours and 3 coats later, I had a nice, fresh blue door (and yes, you can barely tell the door is blue because of the lighting and yes, you can already see the orbed handles in this picture because I didn't take the time to take a picture of the blue door on the one day that it still maintained its old brassy handles).

But, of course, I couldn't stop there.  In my photoshop image, I loved the pop of blue that the front door gave us.  But in this version, the white storm door was totally blocking out the pretty blue door.  So I did what any logical person would do.  A couple days later, I painted the storm door as well.  Because I had paint and primer in one, I just sanded the door down lightly and got my paint on once again.
I'm a really lazy/impatient/eager project person, so I didn't bother to tape off the glass.  I probably should have, but a little wipe down with some goo gone at the end saved the day!  Oh and this time I just took the handle off and orbed it while I was painting the door, so these final shots definitely show the new handle as well!
close up

a little further out

and still a little further out

So now our door is definitely blue.  And I'm pretty sure I really like it!  It reminds me of this slightly hoochy dress I wore to a party a few weeks back.  I knew I looked pretty hot in the dress (something I don't usually say!), but I still felt a little "out there" if you know what I mean.  I like the door and think it looks happy, but it's a pretty bold choice, especially in our neighborhood of more traditional homes, so I feel a bit self-conscious about it.  As a boost to my confidence, though, Josh has yet to complain about it...which usually means he likes it...and a few visitors have told me they like it...so we're going with it!
As I reminder, here is our door as its former self...


What do you all think?


May 22, 2013

Call in the Experts

When we moved into this house, I was frustrated with the landscaping, particularly in the front yard. It wasn't awful, but it wasn't exciting either.  See what I mean?
                           
So the first Spring we lived here, I got out the shovel, rake, and gloves and gave the flower beds a major overhaul.
                          
It was better, but I still wasn't in love with it.  And if we're going to be honest, it didn't hold up well.  I wasn't sure why but the plants just weren't thriving...or really growing at all.  So I called out a landscaper.  My original intention was to have her come out, look at the beds, and tell me what I was doing wrong or what I should plant instead or give me some other words of advice.  Basically, I never planned to pay for anything because I knew my el cheapo husband would never go for it!
The first thing she told me was that our beds were getting too much water with the gutters flowing right in them and that is why the plants were all looking a bit lackluster.  Made sense, but unfortunately the solution which involved rerouting gutters, removing part of our walkway to put gutters under, and installing a drainage thingy in the yard was way more involved than this DIYer could pull off.  Landscaper said she would put together a quote for us.
A couple of weeks later she showed up with the most gorgeous digital image of our potential new front landscaping.  It had a widened driveway, curvy paved new walkway, and lots of pretty flowers and plants.  Honestly, I felt really guilty because she had put so much work into it, and I still thought el cheapo husband was going to have nothing to do with it.
But he clearly was impressed with it as well, and while he clearly was not going to go for the whole hit to the bank account, he was willing to entertain a stage 1 option.  I tried offering to plant the stuff on my own , but it really was a pretty negligent expense by the time we paid for all the materials and work to get the major stuff done!  So, a couple weeks later a few guys and a Bobcat showed up at our house to begin work.  The boys were fascinated!


After relocating a tree, redoing the gutters, rearranging some of our existing plants, and planting a bunch of new stuff,  I now proudly present to you stage 1:


And they were even nice enough to tackle some back landscaping for us with some of our front yard remainders and spread some mulch (finally!) under the boys' playset.

Lesson learned!  DIYing is great, but you have to know your strengths and weaknesses...and sometimes it's just better to call in the experts!  Oh, and of course, I'm already on Josh pressuring him for Stage 2!  That darn walkway was just so pretty!!!


May 20, 2013

Shine On

I swear I think Pinterest can read my mind.  Frequently pins pop up on my news feed (or whatever it's called in Pinterest world) that directly satisfy a current need.  Oftentimes, it's some sort of cookie or other sweet treat, but in this case, it was actually for something much more productive.
May is window cleaning month around here (per my self-imposed cleaning schedule), but I really had no idea...or at least no novel idea...of how I was going to go about it.  And then I saw a pin that promised to have shiny, sparkly windows without any wiping or streaks.  Needless to say, I knew I had a winner.  And now that I have tried it out, I can confidently pass it along to you!  It worked...and in the fun kind of cleaning worked way in which you actually enjoy what you're doing because the results are so fantastic!  Plus, it was amazingly quick and easy.  I didn't even break a sweat and washed each window in about a minute!
Check out those shiny, streak-free windows:

 but if you want to try it out yourself, here's the recipe:

  • 1/2 bottle Jet Dry
  • 2 gallons hot water
  • 1/4 cup powdered dish detergent
  • 3 tbsp. rubbing alcohol
Once you've mixed everything together, start by attacking each window with the jet force of a hose.  Using a sponge brush (I opted for one with a long handle so I could more easily get the whole length of the window), scrub the window with the solution.  Then, rinse the window off.  I found it better to do this with a softer hose setting like shower to prevent as many water spots as possible. 
Easy peasy lemon squeezey, huh?!?  You're welcome!


April 25, 2013

If You Need Us...

You can probably find us here for awhile:
The boys have a brand new playset in the backyard!  And to say that they love it is probably an understatement.  They are in absolute amazement that there are swings, a big slide, and even a telescope (among other things!) in their very own yard.  
It's only been up for a day (it took the nice man installing it for us 2 days to build it!), but they have definitely been getting their play on...which means I have been busy taking tons of pictures (obviously, right?).  And now I present to you way too many pictures of my boys playing:


Think they're having fun?!?
I've said it before and I'll say it again...these are some very lucky children. The play set was actually a (very generous) birthday present from their Nene and Papa...a gift that I'm confident they'll enjoy for years to come!