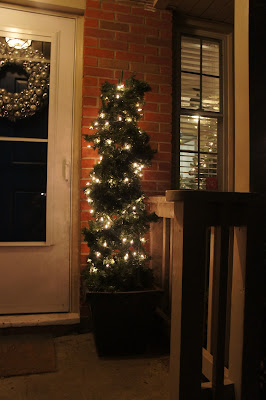
Last week, I showed you our indoor decor (you can check it out here if you missed it) and I promised you that today I would share with you the outdoor stuff. Really, it's not much...just a Pier 1 wreath I got a few years ago and some tomato cage Christmas trees I whipped up this year.
But if you're reading carefully, you may have just noticed that I said tomato cage Christmas trees, and now you're curious...right? As usual, I'll go ahead and show you the afters and then if you want the details, you can keep on reading:
As you can tell from the first shot, I really wanted to have Christmas trees flanking our door. But trees are pretty expensive, so I knew that wasn't really an option. I actually purchased some fake ones at Target last year during their after-season clearance, but when I took them out this year, I realized they were a little flimsy and small for our porch, so they have become Colton and Baby X's own personal trees in their room (not that Baby X is here to enjoy his yet, but I'm sure he will next year!).
Luckily, I had seen tomato cage trees on Pinterest and was anxious to try them out anyways, so off to Home Depot I went to round up my supplies:
- 2 tomato cages
- 10 spools of garland (I wound mine pretty tight...you could probably get away with less)
- 2 spools of lights
- pots I already owned
With supplies in hand, I started off assembling my tomato cages. I don't know much about these things to know if they're all the same, but mine came with three sets of attachers. I found that it was best to just use two....spread further apart at the bottom and a little closer in the middle...to form the most realistic tree shape (the picture below is from the one I used all three attachers on, so it works too, but I just preferred the other way after experimenting).
 |
| that's the piddly Target tree next to it...see what I mean? |
Once the cage is assembled, insert it into the pot and start wrapping your garland. I wrapped mine in a spiral making sure to loop it tightly around each post (you could probably get away with doing it a little looser).
Once you have filled the garland all the way to the top, add your lights like you would to any other tree!
For both of my "trees," I spent a total of about $30...way less than you would to buy a similarly sized artificial tree set anywhere! I just love saving money, don't you? And they really were super simple to make!


I saw those on pinterest too and totally thought about doing them....maybe next year ;)
ReplyDelete