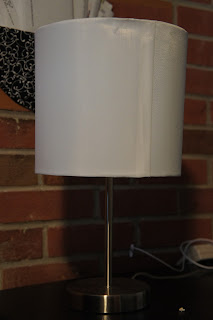
Out in blogland, I have read several stories of people recovering fabric shades with a new fabric and having beautiful new lamps. I have known for a long time that this little lamp would be the perfect candidate for such a project. (Spoiler alert: I was right!). I kept putting the project off, mainly because I didn't have any fabric that would work. Well, last week I was strolling the aisles of AC Moore when I found a packet of 4 quilting squares in my yellow, black, white combo...JACKPOT! The whole packet was only $10, so I scooped it up not yet knowing where/how I would use it. Until I remembered my lamp...
Now if you stalk blogs like I do, this project is probably not going to be earthshattering to you, but this is how I recovered my lamp. There are probably tons of ways to do so, but this was really darn easy, and you probably have most of the supplies on hand. I used:
- fabric
- glue gun
- Stitch Witchery
- iron
To start, I ironed my fabric to make sure there were no creases. Then I just lined the Stitch Witchery up on the top of the lamp shade. Leaving a bit of extra fabric at the top, I laid the fabric over the Stitch Witchery and existing lampshade and ironed. Obviously as I moved across the top of the shade, it became a little easier because the fabric was where I wanted it.
Once I had completed the whole top, I cut off the extra fabric from the bottom and repeated the same lay Stitch Witchery, put fabric on top (with a tiny bit of extra), and iron. I used my extra cut off fabric to fill in the gap, but obviously you may not need to do that. If you do have a gap like I did, you can also iron a piece of Stitch Witchery along the seam. Once everything was ironed on, I went back through the top and bottom with my glue gun to affix the remnants.
Ready for the grand reveal? I am in.love.with.it. Usually, I am a little more ho-hum about my projects but this one really makes me happy. In fact, I'm already on the search for more lamps I can recover in our house. What about you all? Ever recovered an old lamp shade?


great transformation. Thanks for stopping by from blog hop, live in VA too!!
ReplyDeletehttp://stayingclosetohome.blogspot.com
This lamp is fantastic!
ReplyDeleteI'm here from Mingle Monday and I love this re-do! I'm all about being thrify and DIY myself and have a few sad lamps that could use an update like this.
ReplyDeleteI'm your newest follower by the way. :-)
Jayme @
http://simple-sweetlife.blogspot.com/